I’ll never forget the first time I tried to remove my nail tips at home. I had been wearing them for weeks, and one corner started lifting. Instead of reaching for the right tools, I grabbed the edge and peeled it off. The satisfying strip that came off also took a thin layer of my natural nail with it. My nail was sore, thin, and took months to recover.
The truth is, improper removal damages nails — not the product itself. When done correctly with an e‑file, your natural nail stays protected and healthy. Here’s how.
Why an E‑File Makes All the Difference
Nail tips are designed to be durable. Peeling them off tears away layers of your natural nail plate, leaving them thin, weak, and sensitive. An electric nail file (e‑file) uses a spinning bit to gently file away the product in controlled layers. It’s faster than hand‑filing and safer than acetone‑only methods, as long as you follow the right technique.
The key mental shift? You’re not filing the nail — you’re filing the product. In a structured removal, you want to leave a thin, clear layer of base product behind. This acts as a shield, protecting your natural nail plate and providing a smooth foundation for your next set.
What You’ll Need
Before you start, gather your supplies:
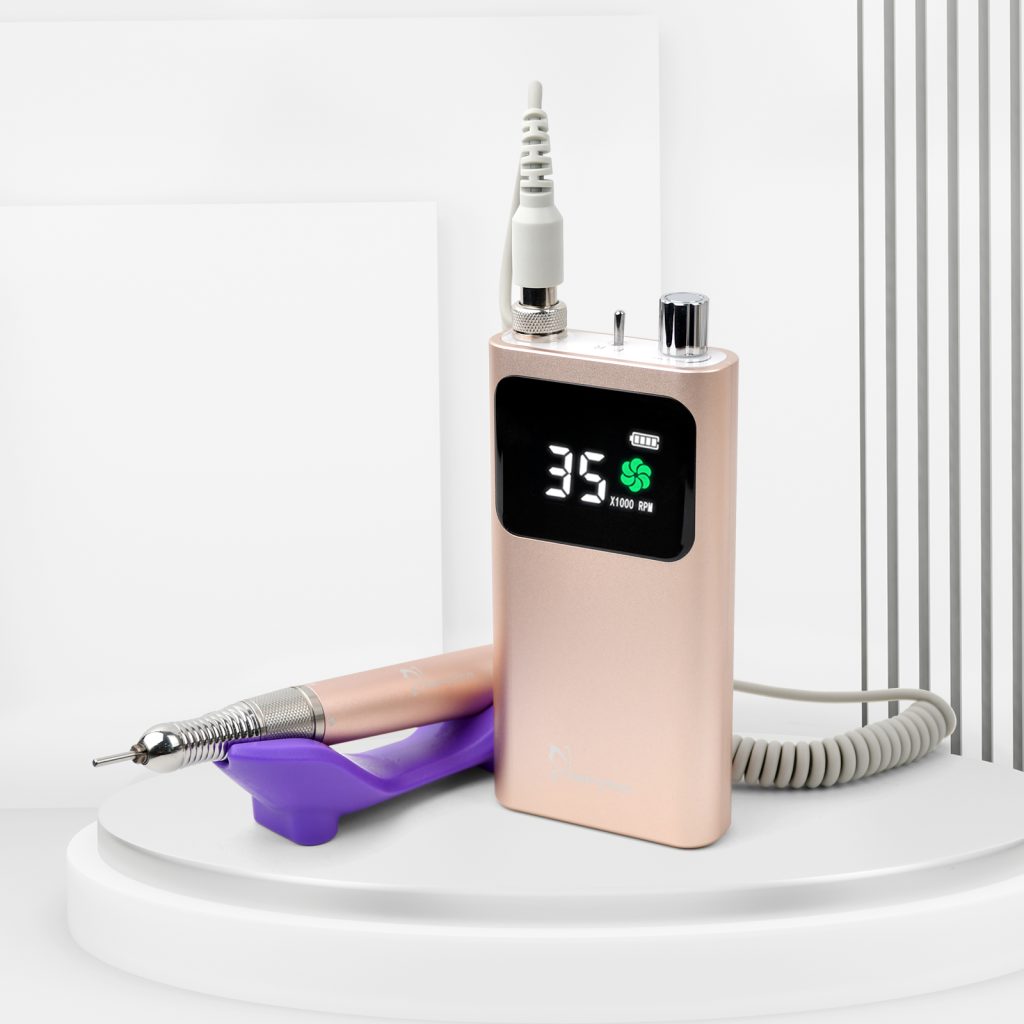
- Electric nail file (e‑file) with adjustable speed (15,000–20,000 RPM or more)
- Coarse carbide bit for bulk removal
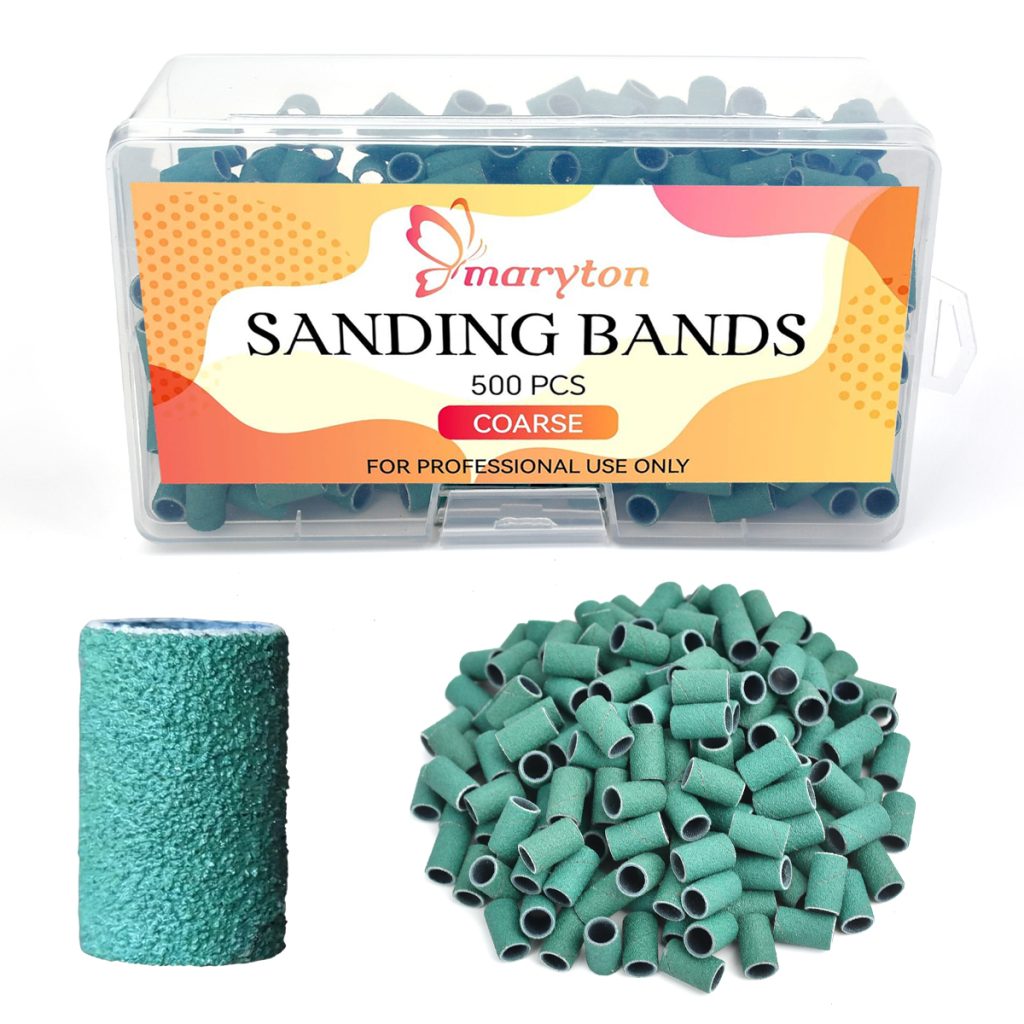
- Medium/fine sanding bands or ceramic bit for thinning
- Dust mask and safety glasses (acrylic dust is fine)
- Cuticle pusher (wooden is gentlest)
- Nail buffer (220+ grit) and cuticle oil for aftercare
- Optional: pure acetone and foil if you choose to soak off the final layer
Choosing the Right Bits for Safe Removal
Picking the correct bit is the most important safety step.
Carbide bits are the professional choice for removing bulk acrylic, gel, and dip powder. Their sharp flutes cut cleanly without generating excessive heat. For shortening the length of your nail tips, choose a medium or coarse carbide barrel bit.
Ceramic bits are a great option for beginners. They remove soft and hard gel with less heat than carbide or diamond, reducing client discomfort. Ceramic bits are gentle yet effective, making them perfect for removing gel nail tips.
Sanding bands are disposable and beginner‑friendly. They mimic a handheld nail file and are excellent for natural nail prep and smoothing after bulk removal. Use a medium grit for refining and a fine grit for finishing.
Step‑by‑Step Removal Process
Step 1: Clip and Prepare
Use nail clippers to cut the nail tips as short as possible. Shorter tips mean less filing time, less dust, and less risk of overheating. Then, using a coarse hand file or a medium grit sanding band at low speed, gently rough up the shiny top coat so acetone can penetrate more easily if you plan to soak later.
Step 2: Choose Your Bit and Set Your Speed
For the bulk of the product, attach a medium or coarse carbide bit or a ceramic barrel bit. Set your e‑file to 15,000–20,000 RPM for acrylic removal or 10,000–15,000 RPM for gel.
If you’re new to e‑filing, start with a sanding band or fine ceramic bit on a lower speed (5,000–8,000 RPM) to get a feel for the tool.
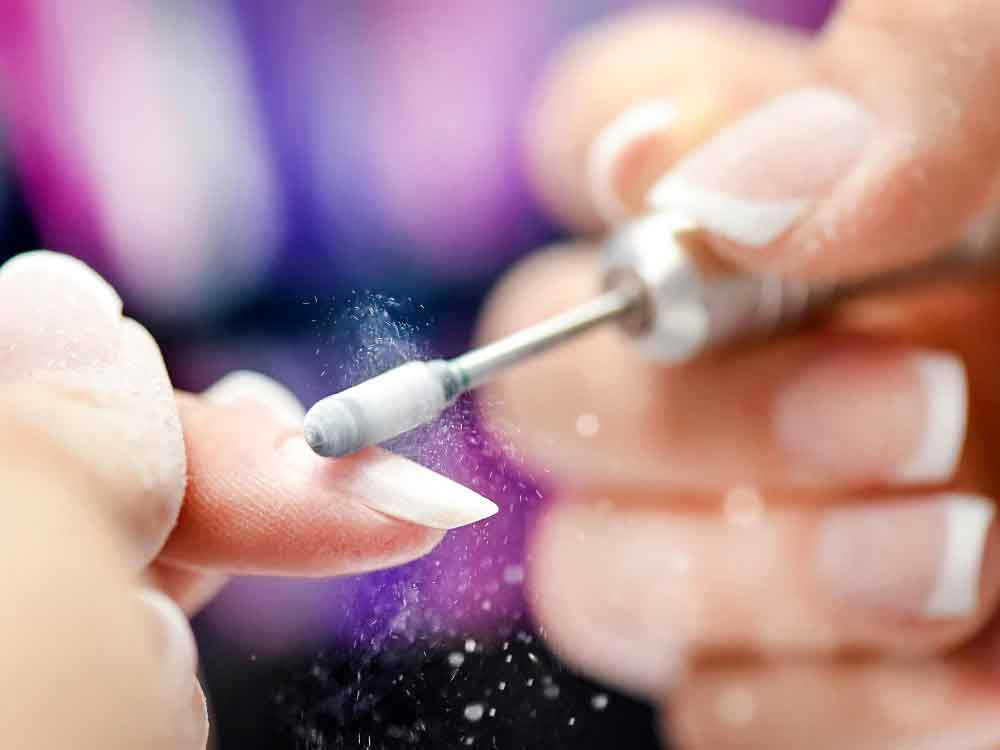
Step 3: The Filing Technique
Hold the e‑file like a pencil and rest your pinky or hand on the table for stability. Work in long, smooth strokes — one direction only. Start at the cuticle area, using the belly of the bit, and pull down toward the free edge. Keep the bit moving constantly. Never hold it in one spot for more than a second. Friction builds heat quickly, which can burn or damage the nail plate.
Work in this order: first file the center of the nail, then the cuticle area, then the tip. Smooth the side walls last. Use light pressure — let the bit do the work. Pressing too hard creates unnecessary friction and removes too much material too quickly.
Step 4: The Color Guide (for Gel Tips)
As you file, watch the dust color. Colored dust means you’re filing the gel product — keep going. When you see white or clear dust, you’ve hit the clear base layer. Stop immediately — that’s your signal that you’ve reached the protective layer above your natural nail.
For acrylic tips, stop filing once about 80–90% of the product is removed and you see a thin layer remaining.
Step 5: The Final Thin Layer
Once you’ve removed most of the product and are left with a thin, clear layer of base gel, put the e‑file away. Switch to a hand file (180–240 grit) to gently smooth out any remaining patchy areas. Alternatively, if the remaining layer is very thin, you can soak it off with acetone: saturate a cotton ball, place it on the nail, wrap with foil, and wait 10–15 minutes. The softened product will then slide off easily with a wooden pusher.
Step 6: Finish and Hydrate
Buff the nail surface lightly with a fine buffer block to remove any residue. Then apply cuticle oil generously to every nail. Acetone and filing both dehydrate the nail plate, and your nails will need extra moisture to recover. Massage the oil in and follow with a rich hand cream.
Common Mistakes That Damage Natural Nails
- Peeling or picking: Never. Peeling rips off layers of your natural nail.
- Using coarse bits on natural nails: Carbide bits should never impact the natural nail plate. Switch to a fine grit or hand file once you’re near the nail.
- Staying in one spot: This creates friction heat and “rings of fire” — permanent grooves in the nail plate.
- Using too much pressure: Let the e‑file do the work. Pressing down removes too much product too quickly.
- Skipping aftercare: Filing and acetone both dry out nails. Oil immediately and daily for the next week.
The Bottom Line
Removing nail tips with an e‑file is faster, cleaner, and gentler on your natural nails than peeling or aggressive manual filing — when done correctly. The keys are choosing the right bit, keeping your speed moderate, using light pressure, and stopping once you reach that thin protective layer.
Take your time, practice on a few fake tips first, and always, always finish with cuticle oil. Your nails will thank you.
Read also: When Your Nails Split: Understanding and Healing Fragile Tips